S3
Simple Storage Service (S3) provides a cost-effective and flexible place to store your content. If you’re using more than one server inside of AWS, we recommend using a combination of S3 and CloudFront for serving your content.
CloudFront Origin Access Identity
To provision S3, the necessary IAM users, etc, we first need to create an Origin Access Identity for CloudFront.
- Make sure you are logged in to the AWS console as the root user (IAM users will not work).
- Go here https://console.aws.amazon.com/cloudfront/home?region=us-east-1#oai: and click Create OAI.
- Enter
Rustici Content Controller OAIfor the comment and click Create.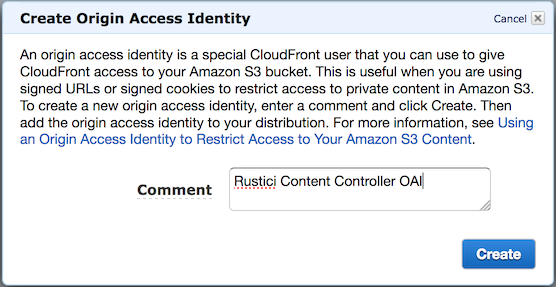
- Take note of the ID beside
Rustici Content Controller OAI. You will need it in a few steps.
S3 Bucket and IAM User Setup
This part has quite a few steps, so we’ve provided an Ansible Playbook to setup your S3 buckets, logging, and IAM user “automagically”. This playbook will:
- Create 2 new S3 buckets for you (one for content and one for logs).
- Set up an IAM user, group, and policy that assign sufficient rights to read/write from the new bucket.
- Grant your CloudFront Origin Access Identity the rights it needs to access the bucket.
- Create a valid
group_vars/s3.ymlfile for Ansible to use when it sets up Content Controller.
Run the Playbook
- SSH in to your Ansible instance, and go to your
ContentController-PublicDeployfolder. - Run the following command (but replace
CLOUDFRONT_ORIGIN_ACCESS_IDENTITY_IDandDEMO.CONTENTCONTROLLER.NETwith the proper values for your install).
ansible-playbook aws-s3.yml \
    -e "cloudfront_origin_access_identity=CLOUDFRONT_ORIGIN_ACCESS_IDENTITY_ID" \
    -e "ServerName=DEMO.CONTENTCONTROLLER.NET" \
    -e "env=prod" \
    -e "ClientName=Rustici"
- Enter the following values when asked (but replace
CLIENT_NAMEwith the name of your company with no spaces). If you plan on setting up a separate staging environment, addstgorprodto your bucket name prefix and username.- S3 bucket name prefix:
CLIENT_NAME - AWS account ID (you can find this in the AWS console)
- Username:
rustici-cc-s3-user
- S3 bucket name prefix:
- Everything you need for S3 to work should have been created. A
group_vars/s3.ymlfile has been created with the credentials needed for Content Controller to access S3.
Deleting It All and Starting Over
Sometimes things don’t work on the first try, and you need to start over. To undo all of your changes and delete the bucket and user you’ve created, run the playbook again with the Slartibartfast variable set to true.
NOTE THAT THIS IS DANGEROUS AND WILL DESTROY YOUR S3 BUCKET AND EVERYTHING IN IT. ONLY USE IT IF YOU HAVEN’T STARTED USING S3 IN PRODUCTION.
ansible-playbook aws-s3.yml \
    -e "cloudfront_origin_access_identity=CLOUDFRONT_ORIGIN_ACCESS_IDENTITY_ID" \
    -e "ServerName=DEMO.CONTENTCONTROLLER.NET" \
    -e "env=prod" \
    -e "ClientName=Rustici" \
    -e '{"Slartibartfast": true}'