Load Balancer and Target Group
We'll need to create a load balancer to distribute traffic to your application server(s). If you use CloudFront and S3, you should use a load balancer - even if you only use 1 application server. We'll also create a target group, which tells the load balancer which servers to distribute traffic to.
Go to Services -> EC2.
- Click Load Balancers on the left sidebar, and click Create Load Balancer.
- Click Create under Application Load Balancer.
- Name it
cc-load-balancer, choose internet-facing, and either ipv4 or dualstack (if you want to support IPv6). - Change Load Balancer Protocol to HTTPS (Secure HTTP) and make sure the port is
443. - Select
Rustici CC VPCfor the VPC. - Under Availability Zones, beside
us-east-1a, click Select a subnet..., then choose the public subnet (CC Public 1). Then chooseCC Public 2forus-east-1b.
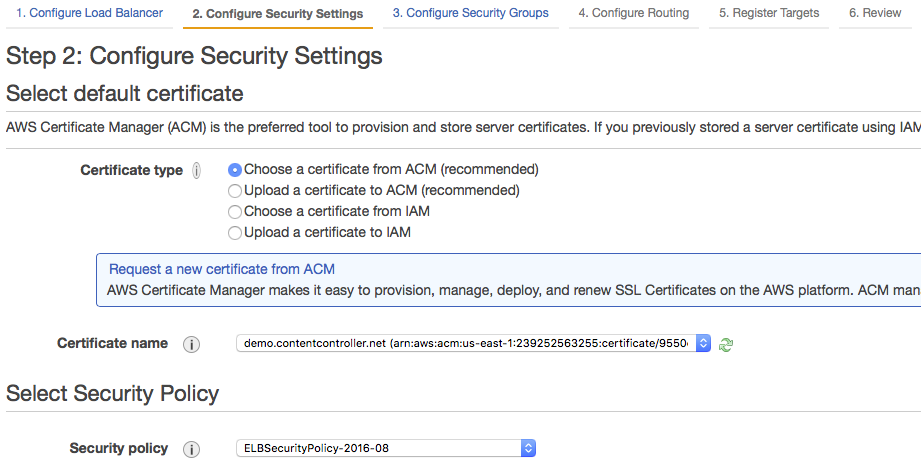
- Click Next: Configure Security Settings.
- Click Choose a certificate from ACM and choose the certificate that you requested or uploaded earlier.
- Choose a Security policy. See these AWS SSL Security Policies docs for more details about which one to pick, or take a look at the FAQ Security docs.
- Click Next: Configure Security Groups.
- Choose Select an existing security group and select the
CC Load Balancergroup that you created earlier.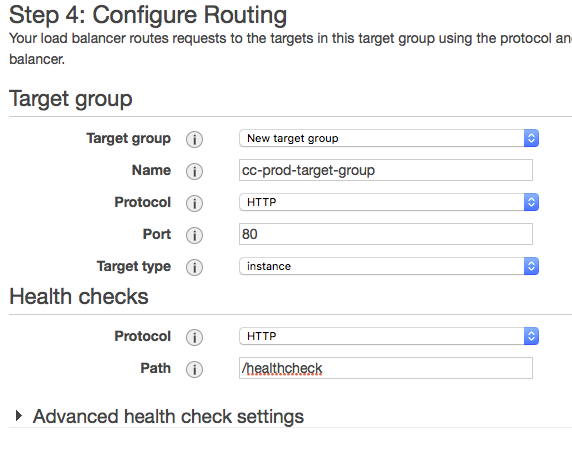
- Click Next: Configure Routing.
- Choose New Target Group.
- Name it
cc-prod-target-group, use HTTP and port80with a target type of instance. The health checks should be HTTP and the path should be/healthcheck. - Click Next: Register Targets (don't select any instances for now), and then click Next: Review.
- Click Create.
Note: You may want to enable deletion protection and access logs for your load balancer. For more information see Access Logs for Elastic Load Balancers.